
How to Flash Rockchip Firmware using Rockchip Factory Tool (Definitive Guide)
Rockchip (RK-series) chipsets are powerful processors commonly found in a wide range of Android devices, including tablets, TV boxes, and single-board computers. When these devices suffer from critical software issues like a hard brick, being stuck in a bootloop, or persistent errors, the most powerful solution is to flash the official stock firmware.
The Rockchip Factory Tool is an official, Windows-based application designed specifically for this purpose. It flashes a single, compressed firmware file, usually named update.img, to completely restore a device’s operating system. This guide will walk you through every step of the process, from installing drivers to troubleshooting common errors.
Core Concepts Explained
- update.img File
- This is the all-in-one firmware package for Rockchip devices. It contains the bootloader, kernel, system, recovery, and all other necessary partitions compressed into a single file.
- Loader Mode
- This is the standard flashing mode for a working Rockchip device. You enter it by holding a specific button combination (a “boot key”) while connecting the device to a PC.
- Maskrom Mode
- This is a deeper, low-level mode that activates automatically if the device’s primary bootloader is erased or corrupted. It’s an emergency mode that allows the Factory Tool to revive a seemingly dead (hard-bricked) device.
- Rockchip Driver Assistant
- This is an essential all-in-one utility that uninstalls old drivers and installs the correct Rockchip drivers required for your PC to communicate with the device in any mode.
⚠️ Before You Begin: Essential Prerequisites
- A Windows PC: The tool and drivers are designed for Windows (compatible with Windows 7, 10, and 11).
- Correct Firmware: You must have the correct
update.imgfirmware file specifically for your device model. Flashing the wrong firmware can brick your device. - High-Quality USB Cable: A reliable data cable is crucial for a stable connection.
- Backup Your Data: This process will completely and permanently erase all data (apps, photos, files) on your device’s internal storage.
- Sufficient Battery: Ensure your device is charged to at least 60% to prevent it from shutting down during the flashing process.
🛠 Required Downloads
| File / Tool | Purpose | Download Link |
|---|---|---|
| Rockchip Factory Tool | The main flashing application. | Download Tool |
| Rockchip Driver Assistant | Installs all necessary USB drivers. | Download Drivers |
✅ Step-by-Step Flashing Guide
Step 1: Install the Rockchip Drivers
This is the most important step. Without the correct drivers, your PC will not detect the device.
- Download and extract the Rockchip Driver Assistant.
- Run the
DriverInstall.exeapplication. - First, click the “Uninstall Driver” button to remove any old or conflicting drivers.
- Once that’s done, click the “Install Driver” button. Follow any on-screen prompts to complete the installation.
Step 2: Prepare Firmware and Flashing Tool
- Download the correct
update.imgfirmware file for your specific device model. - Download and extract the Rockchip Factory Tool into a folder on your desktop.
- Place the
update.imgfirmware file in an easy-to-access location, like the same folder as the Factory Tool.
Step 3: Load the Firmware into the Factory Tool

- Open the Rockchip Factory Tool folder and run
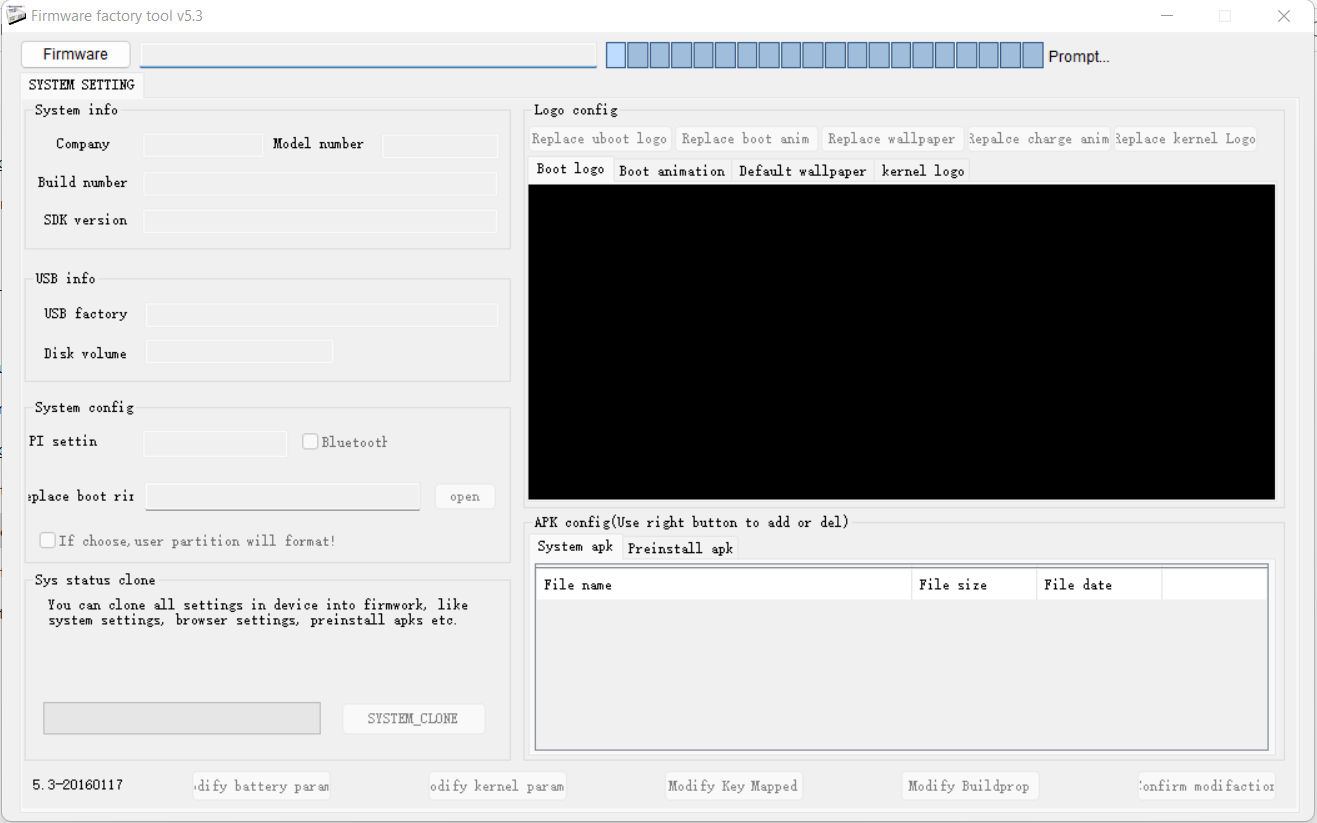
FactoryTool.exeas an administrator. - Click the button labeled “Firmware” (usually the top-left button).

rockchip factorytool firmware selection - Navigate to and select your
update.imgfile. The tool will load and verify it, displaying information like the firmware version and loader version.
Step 4: Connect Your Device in Loader Mode
- Power off your tablet or TV box completely.
- Press and hold your device’s boot key. For most Rockchip tablets, this is the Volume Up button. For some, it may be Volume Down.
- While still holding the boot key, connect the device to your PC using the USB cable.
- The Rockchip Factory Tool should immediately detect the device. One of the numbered port squares at the top will turn a solid color (usually blue or green). You can now release the boot key.
Step 5: Begin the Flashing Process

- With the firmware loaded and the device detected, click the “Run” button.
- The tool will begin flashing the firmware to your device. You will see a progress bar and status updates in the log window.
- Do not disconnect the device or use your computer for other tasks during this time. The process can take several minutes.
Step 6: Finish Up
- The process is complete when the progress bar reaches 100% and the main status box for that port turns green and shows “Success.”
- You can now safely disconnect your device.
- Power on your device. The first boot after flashing will take much longer than usual (5-10 minutes) as it sets up the new system. Be patient.
🔧 Troubleshooting Common Issues
- Problem: The tool shows “No Device Found.”
- Solution: This is a driver or connection issue.
- Rerun the Rockchip Driver Assistant and reinstall the drivers.
- Ensure you are using the correct boot key. If Volume Up doesn’t work, try again with Volume Down.
- Use a different USB port (USB 2.0 ports are often more reliable) and a different data cable.
- Check Windows Device Manager. If you see an unknown “Rockusb Device,” the drivers are not installed correctly.
- Problem: The flashing process fails with an error.
- Solution: This can have several causes.
- The
update.imgfile may be corrupted. Download it again from a reliable source. - There might be an incompatibility between the tool and the firmware. Try a slightly different version of the Rockchip Factory Tool.
- If the flash fails repeatedly at the same percentage, it could indicate a failing storage chip (eMMC) on the device, which is a hardware problem.
- The
- Problem: My device is stuck in “Maskrom Mode.”
- Solution: Don’t panic! This is a good sign for a bricked device. It means the bootloader is corrupt, but the low-level Maskrom mode is working. The Factory Tool is specifically designed to detect and flash devices in this state. Simply connect the device (you may not even need a boot key), load the firmware, and click “Run” to repair it.
- Problem: The flash succeeded, but the device is stuck on the boot logo.
- Solution: The device needs a factory reset to clear out old data. Disconnect it from the PC, then boot into recovery mode (usually by holding Power + Volume Up). In the recovery menu, use the volume keys to navigate to “Wipe data/factory reset” and select it with the power button. Once complete, select “Reboot system now.”

![How to Flash Secure MediaTek Devices with SP Flash Tool [Auth Bypass Guide]](https://www.androidfirmwarefile.com/wp-content/uploads/2025/09/How-to-Flash-Secure-MediaTek-Devices-with-SP-Flash-Tool-768x384.jpeg)


