![How to Flash Secure MediaTek Devices with SP Flash Tool [Auth Bypass Guide]](https://www.androidfirmwarefile.com/wp-content/uploads/2025/09/How-to-Flash-Secure-MediaTek-Devices-with-SP-Flash-Tool.jpeg)
How to Flash Secure MediaTek Devices with SP Flash Tool [Auth Bypass Guide]
Modern MediaTek chipsets (most Dimensity and recent Helio G/P series) come with a security feature called Secure Boot, also known as SLA (Secure Link Authentication) or DAA (Download Agent Authentication). This security protocol prevents unauthorized tools, including the standard SP Flash Tool, from writing firmware to the device, often resulting in a red “Authentication Error” bar.
While this is great for security, it creates a major problem for users who need to unbrick a dead phone or fix critical software errors. To solve this, developers in the Android community have created MTK Authentication Bypass Tools. These tools temporarily disable the Secure Boot protection, allowing SP Flash Tool to connect to and flash the device.
DISCLAIMER: This is an advanced procedure that uses unofficial, third-party tools. It carries inherent risks, including the potential to permanently brick your device if done incorrectly. Proceed with caution and at your own risk. Ensure you are using the correct firmware for your specific phone model.
Prerequisites: What You Will Need
- A MediaTek Android device that requires an authentication bypass.
- The correct stock firmware (.pac file) for your specific device model.
- The latest version of the SP Flash Tool.
- The correct MediaTek VCOM USB Drivers.
- An MTK Auth Bypass Tool. A reliable and commonly used option is the MCT MediaTek Tool, but others exist.
- A high-quality USB cable.
The Step-by-Step Flashing Process
Follow these steps in the exact order. The key is to bypass the security first and then immediately use SP Flash Tool while the protection is disabled.
Step 1: Install MediaTek VCOM Drivers
This is the most critical step. Your computer must be able to recognize your phone in its preloader mode. Download, extract, and install the VCOM drivers. On modern Windows (10/11), you will likely need to disable Driver Signature Enforcement for the drivers to install correctly.
Step 2: Prepare Your Files
Extract the Firmware, SP Flash Tool, and the MTK Auth Bypass Tool into three separate, clearly named folders on your desktop for easy access.
Step 3: Launch the Auth Bypass Tool
Open the bypass tool’s folder and run the executable file. You will see a simple interface, often with a main button like “Disable Auth” or “Bypass SLA/DAA.”
Step 4: Connect and Bypass Your Device
This step requires precise timing.
- Click the “Disable Auth” button in the bypass tool. The tool will now wait for a device to connect.
- Power off your MediaTek device completely.
- Press and hold the correct boot key combination. For most modern MediaTek devices, this is both Volume Up + Volume Down buttons.
- While holding the buttons, connect the phone to your PC with the USB cable.
- The bypass tool should detect the device and display a success message, such as “MTK Secure Boot Bypass Success!” or “Protection Disabled.”
- Crucially, DO NOT disconnect the phone or close the bypass tool. Leave it connected and running in the background.
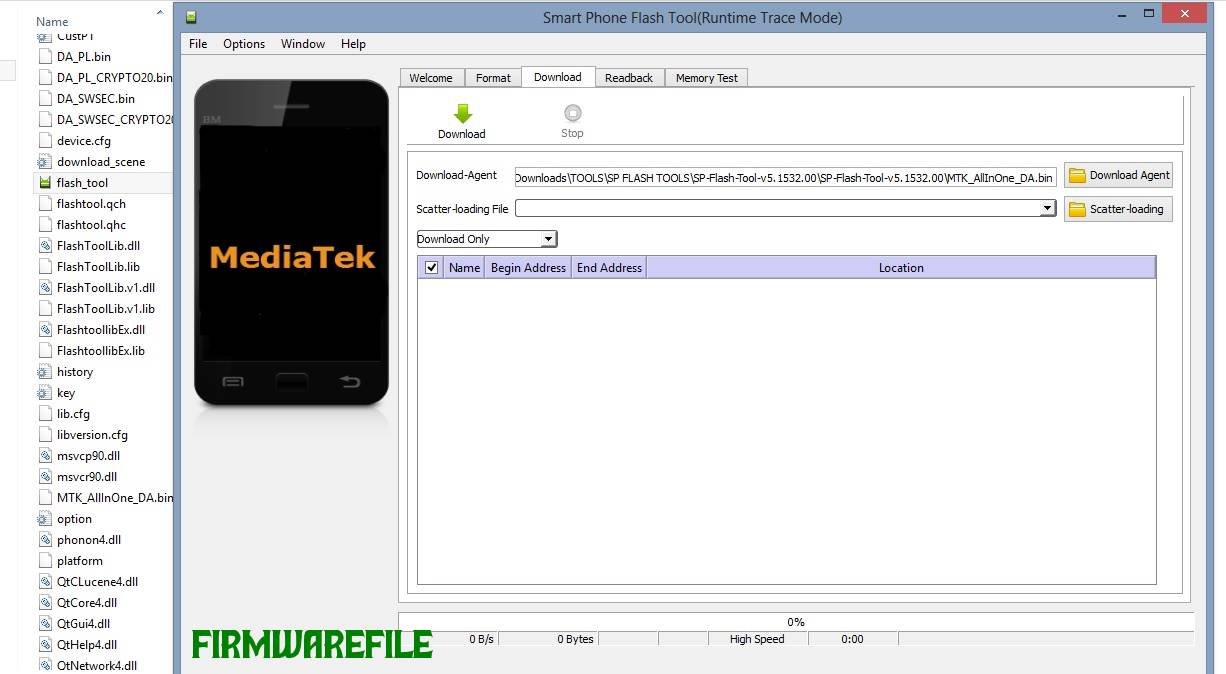
Step 5: Configure and Use SP Flash Tool
- With the phone still connected and bypassed, launch flash_tool.exe from the SP Flash Tool folder.
- Click the “choose” button next to “Scatter-loading File” and select the …_Android_scatter.txt file from your extracted firmware folder.
- Ensure the flashing mode in the dropdown menu is set to “Download Only” to protect your IMEI and other critical data.
- Go to the “Options” menu in SP Flash Tool, select “Connection,” and make sure the correct COM port for your device is selected.
- Click the large green “Download” button.
Step 6: Complete the Flash
Because the phone is already connected and its security is bypassed, the flashing process should begin immediately. You will see the progress bars at the bottom of the tool turn red, then yellow as the firmware is written. A successful flash is confirmed by a pop-up window with a large green checkmark.
Step 7: Finish Up
Once you see the green checkmark, you can close SP Flash Tool and the Auth Bypass Tool. Disconnect your phone and hold the Power button to turn it on. The first boot will be much longer than usual.
Troubleshooting Common Errors
- Auth Bypass Tool Doesn’t Detect the Phone: This is the most common problem. It’s almost always caused by a driver issue. Re-install the VCOM drivers, restart your PC, use a different USB port, and ensure you are pressing the correct boot keys (Vol Up + Vol Down) before plugging in the cable.
- Bypass Succeeds, but SP Flash Tool Still Fails: The bypass connection may have timed out. Disconnect the phone, close SP Flash Tool, and restart the entire process from Step 3. Ensure you are using the correct scatter file for your device.
- SP Flash Tool shows a BROM ERROR: If this happens even after a successful bypass message, it could mean the bypass tool version is not fully compatible with your specific chipset. You may need to search for a different or more updated version of the bypass tool.
- Phone is Bricked/Dead After a Failed Flash: This is a significant risk. If a flash fails and corrupts the preloader partition, the device may no longer be detectable, even by the bypass tool. Recovering from this state often requires advanced “test point” methods and is best handled by a professional.